MCP Setup
Setting up an MCP integration in Bodhi App is a two-layer flow:
- Server — published once by an admin in the workspace catalog (or, optionally, supplied URL-by-URL by individual users). Defines where to connect and how to authenticate.
- Instance — created per user. Combines a server with the user's own credentials, a tool whitelist, and an enabled flag.
This page walks the user-side workflow. The admin-side workflow lives at Pre-registered Servers.
Skip ahead: deciding which auth method a server expects? Jump to Auth Methods.
Browse available servers
Open /ui/mcps/servers/ to see every server published in the workspace catalog. The page shows a table with name, URL, status (enabled / disabled), and how many user instances exist against each row. Expanding a row surfaces the auth configurations attached — useful for confirming what kind of credential the server expects before you instantiate it.
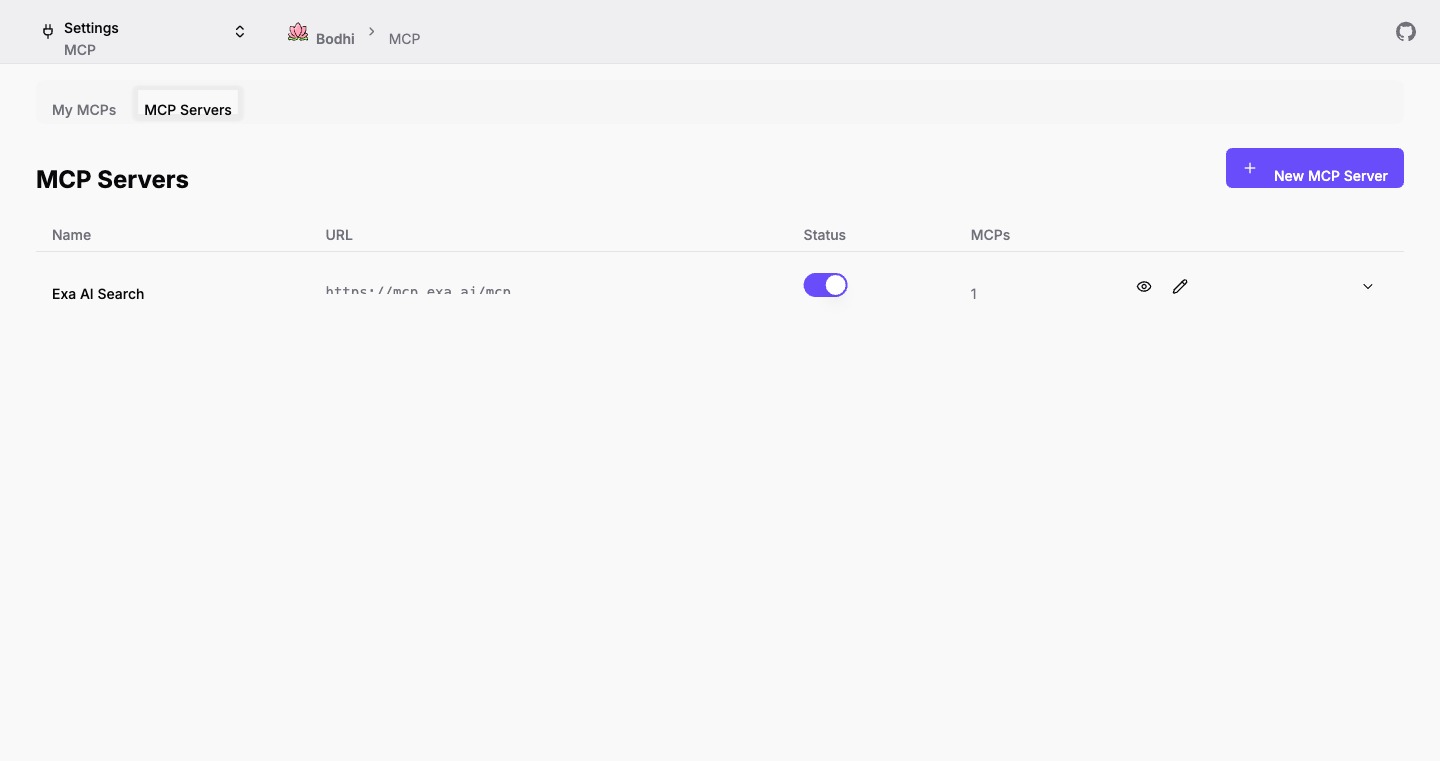
Non-admins see status badges; admins see toggle switches and an Edit button on each row.
Manage your instances
Open /ui/mcps/ to see your own MCP instances. Each row shows:
- The instance name and description.
- The underlying server URL.
- A status badge — Active, Disabled (instance toggled off), or Server Disabled (server toggled off by admin).
- Action buttons for playground, edit, and delete.
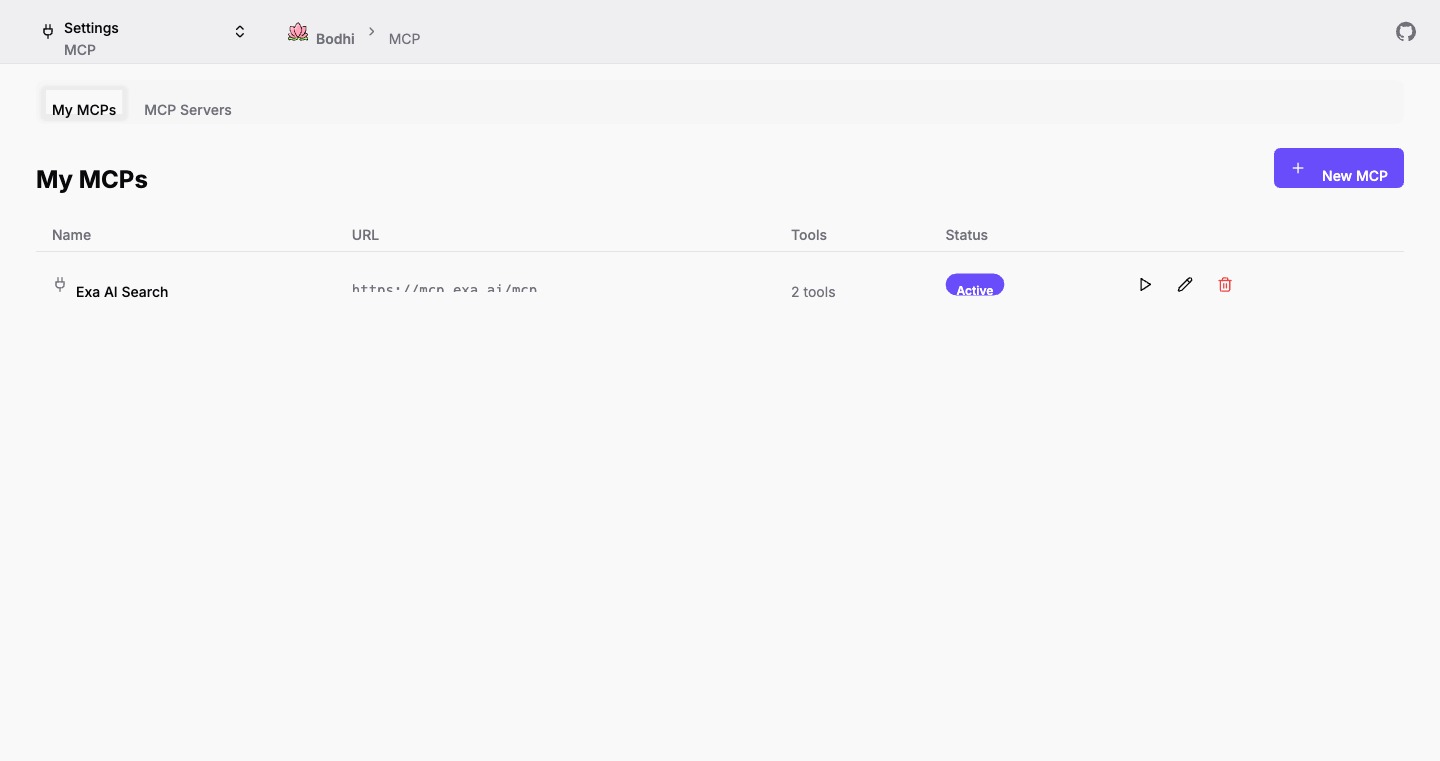
Playground and edit are disabled when the parent server is disabled.
Create an instance
Click New MCP on the My MCPs page. The form has four steps; what you see in step 3 depends on the auth template the admin attached to the server.
1. Pick a server
A searchable combobox lists every enabled server in the catalog. Search filters by name, URL, and description. Admins also see an Add New MCP Server option that jumps to the catalog form.
When you pick a server, Bodhi auto-fills:
- Name — copied from the server name (you can change it).
- Slug — derived from the URL's hostname (letters, numbers, and hyphens; max 24 chars).
- Description — copied from the server, optional.
2. Confirm details
Adjust name, slug, description as needed. Toggle Enable MCP off if you want to create the instance without making it active yet (you can flip it on later from the edit page).
3. Authentication
This is the branch that depends on what the admin templated. The auth dropdown shows Public (No Auth) plus every auth config attached to the server. Pick one.
Branch A — Public
No credentials needed. Skip to step 4.
Branch B — Header
A summary panel appears showing the auth config name and the field(s) the server expects (e.g. Authorization, X-API-Key). Each field renders as a password input with a show / hide toggle.
Paste the secret value (e.g. Bearer sk-...). Bodhi encrypts it server-side before storing.
See Auth Methods → Header-based for when this is the right choice.
Branch C — OAuth (preregistered or DCR)
A summary panel appears showing the auth config name, the registration type (Pre-Registered or Dynamic Registration), and the auth server URL. Click Connect to start the OAuth flow:
- Bodhi saves the form state to session storage so it survives the redirect.
- Your browser is redirected to the OAuth provider's authorization page.
- After you approve, the provider redirects back to
/ui/mcps/oauth/callback/. - Bodhi exchanges the authorization code for tokens, then returns you to the form with a green Connected badge.
A Disconnect button beside the badge revokes the stored token and returns the form to the unconnected state — useful if you authorized as the wrong account.
The two OAuth branches behave the same from your perspective; the difference is whether the admin pre-pasted a client_id or whether Bodhi registered itself dynamically. Both are described in Auth Methods.
Admin escape hatch: if no suitable auth config is attached, admins see a + New Auth Config option in the dropdown that jumps to the server detail page so they can add one without leaving the flow.
4. Save
Click Create MCP. The instance is saved and you are returned to the My MCPs list. Tool discovery and whitelisting happen on the same form when you reopen it for edit (see below).
Edit an instance
Click the pencil icon on the My MCPs row to reopen the form. The server selector is read-only in edit mode; everything else is editable. For OAuth instances, the connected state is preserved — Disconnect / Connect lets you re-authorize without recreating the instance.
This is also where you fetch and whitelist tools:
- Click Fetch Tools — Bodhi calls the MCP server, lists every tool it advertises, and shows them with checkboxes.
- Tick the tools you want to allow. Select All / Deselect All speed up bulk changes. The counter shows
N/M selected. - Click Update MCP to save.
Only whitelisted tools fire when a model requests them in chat or the playground. Non-whitelisted tools are blocked even if the model tries.
Delete an instance
Click the trash icon on the My MCPs row. A confirmation dialog asks before permanent deletion. Deletion removes any stored OAuth token bundle for the instance.
Troubleshooting
- "Server Disabled" badge — the admin has turned off the parent server. Ask them to re-enable it; you cannot create or edit instances against a disabled server.
- OAuth dance fails — usually a redirect-URI or scope mismatch on the provider side. Confirm the admin templated the correct auth endpoints.
- Connect button does nothing — the authorization URL did not pass URL validation. Check the server's auth template.
- No tools after Fetch — the server returned an empty tool list. Re-check connection state in the Playground; it surfaces the connection error directly.
Where to next
- Auth Methods — picking between Header / OAuth preregistered / OAuth DCR.
- Usage in Chat — flip MCPs on for a conversation and let the model call tools.
- Playground — manual tool runner for debugging.