Pre-registered Servers
Admin-only page. If you are not the workspace administrator, see Setup instead — you will pick from this catalog when creating your own MCP instances.
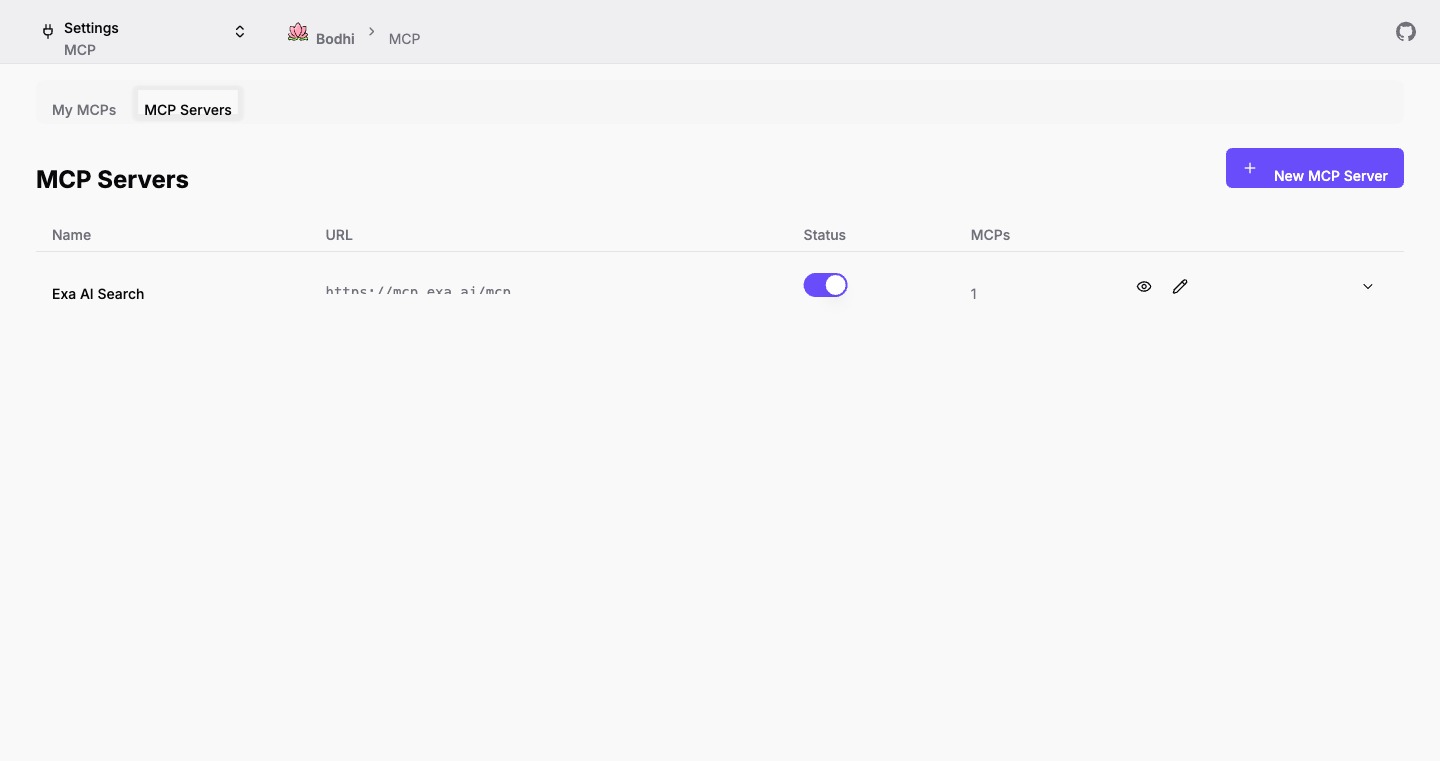
The pre-registered server catalog (informally, the MCP store) lives at /ui/mcps/servers/. Admins use it to publish MCP servers — URL, auth template, friendly name — so every user on the deployment can create an instance without copying configuration around.
Pre-registration is optional. Users can still type a URL by hand on the New MCP page. But for any server you expect more than one user to connect to, publishing it once saves time and keeps auth templates consistent.
Who has access
- Admin — full create / edit / delete on servers and auth configs. Sees toggle switches for the enabled flag, plus the + New MCP Server button at the top of the list.
- Manager / PowerUser / User — read-only access to the catalog. Sees enabled / disabled badges instead of toggles. Can view a server's details and copy its URL.
The same row also surfaces an MCPs column counting how many user instances have been created against the server — handy for understanding usage before you disable or delete a row.
Server list
The list page shows every published server with:
- Name + description.
- URL of the MCP endpoint.
- Status — toggle switch (admins) or badge (everyone else).
- MCPs count — total user instances created from this server.
Expanding a row reveals the auth configurations attached to that server — name plus a type badge (Header / OAuth Pre-Registered / OAuth DCR). If the server was published with no auth template, the expanded section is empty.
Each server row carries action buttons:
- View — open the read-only detail page (everyone).
- Edit — open the edit form (admin only).
Publishing a server
Click New MCP Server to open the create form at /ui/mcps/servers/new/.
Required fields
- URL — the MCP server endpoint (e.g.
https://mcp.example.com/mcp). Validated as a URL on submit. - Name — human-readable label, max 100 characters. Auto-populates from the URL's second-level domain when blank.
Optional fields
- Description — brief description of the server's purpose, max 255 characters.
- Enabled — when off, users cannot create new instances against this server (defaults to on).
Authentication template
Expand the Authentication Configuration (Optional) section to attach an auth template. Picking the right method depends on what the server expects — see Auth Methods for the decision matrix.
None (Public)
No credentials sent. Default. Use for fully public MCPs.
Header
A static API key or bearer token sent with every request.
- Name — label for this auth config (e.g. "Production API Key").
- Header entries — one or more
(param_type, param_key)pairs. The user fills in the actual values when they create an instance — admins template the field names, not the secrets.
This keeps user secrets out of the workspace catalog: each user supplies their own header value at instance creation time.
OAuth — Pre-Registered
A fixed client_id issued by the MCP server's developer portal.
- Name — label for this config.
- Client ID — the OAuth client identifier.
- Client Secret (optional) — for confidential clients.
- Authorization Endpoint — the OAuth
/authorizeURL. - Token Endpoint — the OAuth
/tokenURL. - Scopes (optional) — space-separated.
Users instantiate, click Connect, run the OAuth dance against their own account.
OAuth — Dynamic Registration
For servers that implement RFC 7591 (DCR) and RFC 8414 (server metadata discovery).
When you select Dynamic Registration on the New Server page, Bodhi calls the discovery endpoint, populates OAuth endpoints automatically, then performs Dynamic Client Registration at submit time to obtain a client_id and client_secret. No manual entry of OAuth IDs.
If discovery fails, the form falls back silently to the Pre-Registered form so you can fill the fields manually.
Detail in Auth Methods.
Server detail page
/ui/mcps/servers/view/?id=<serverId> shows the server's properties plus all attached auth configurations. From here, admins can:
- Add Auth Config — attach another auth template inline. Unlike the New Server page, this form does not silently fall back on DCR failures — discovery errors are shown so admins can fix them.
- Delete an auth config, after a confirmation dialog. Deleting an auth config also removes any OAuth tokens minted under it; user instances that depended on it lose their auth.
Non-admins see the same page in read-only mode (no add/delete buttons).
Editing a server
/ui/mcps/servers/edit/?id=<serverId> lets admins update URL, name, description, and the enabled flag.
Changing the URL pops a confirmation dialog: cached tools and tool whitelists on every linked user instance get cleared, since they may not match the new server. Auth configurations are listed read-only on the edit page; use the detail page to add or delete them.
Disabling vs deleting
- Disable (toggle off) when you want to keep the row and its history but stop new instances. Existing instances see a "Server Disabled" badge in their list and lose playground / edit access until the server is re-enabled.
- Delete is destructive. There is no UI delete button at the time of writing — disable is the right tool for retiring a server. Reach out via the API if you need permanent removal.
What users see
When a user opens New MCP at /ui/mcps/new/, the server combobox lists every enabled server in your catalog, searchable by name, URL, or description. They:
- Pick a server.
- Bodhi pre-fills the instance name from the server's name and the slug from the URL's hostname.
- The auth dropdown lists the templates you attached — or Public (No Auth) if there are none.
- They fill credentials (header) or click Connect (OAuth), pick which tools to whitelist, and save.
Admins also see an extra + New Auth Config entry in the auth dropdown that jumps back to the server detail page if a template is missing.
Where to next
- Setup — what users do once a server is published.
- Auth Methods — choosing the right auth template.
- App Access Management — how external apps reach published MCPs through the proxy.