MCP Setup
Bodhi App integrates with external tool providers through the Model Context Protocol (MCP). Setup involves two layers: MCP Servers managed by administrators, and MCP Instances created by individual users.
MCP Servers
MCP Servers are admin-managed endpoints that define where Bodhi connects to access external tools. Manage them at /ui/mcp-servers/.
Server List
The MCP Servers page displays all registered servers in a table with columns for name, URL, status, and MCP instance count. Admins can toggle a server's enabled/disabled state directly from the list via a switch control. Expanding a row reveals the auth configurations associated with that server.
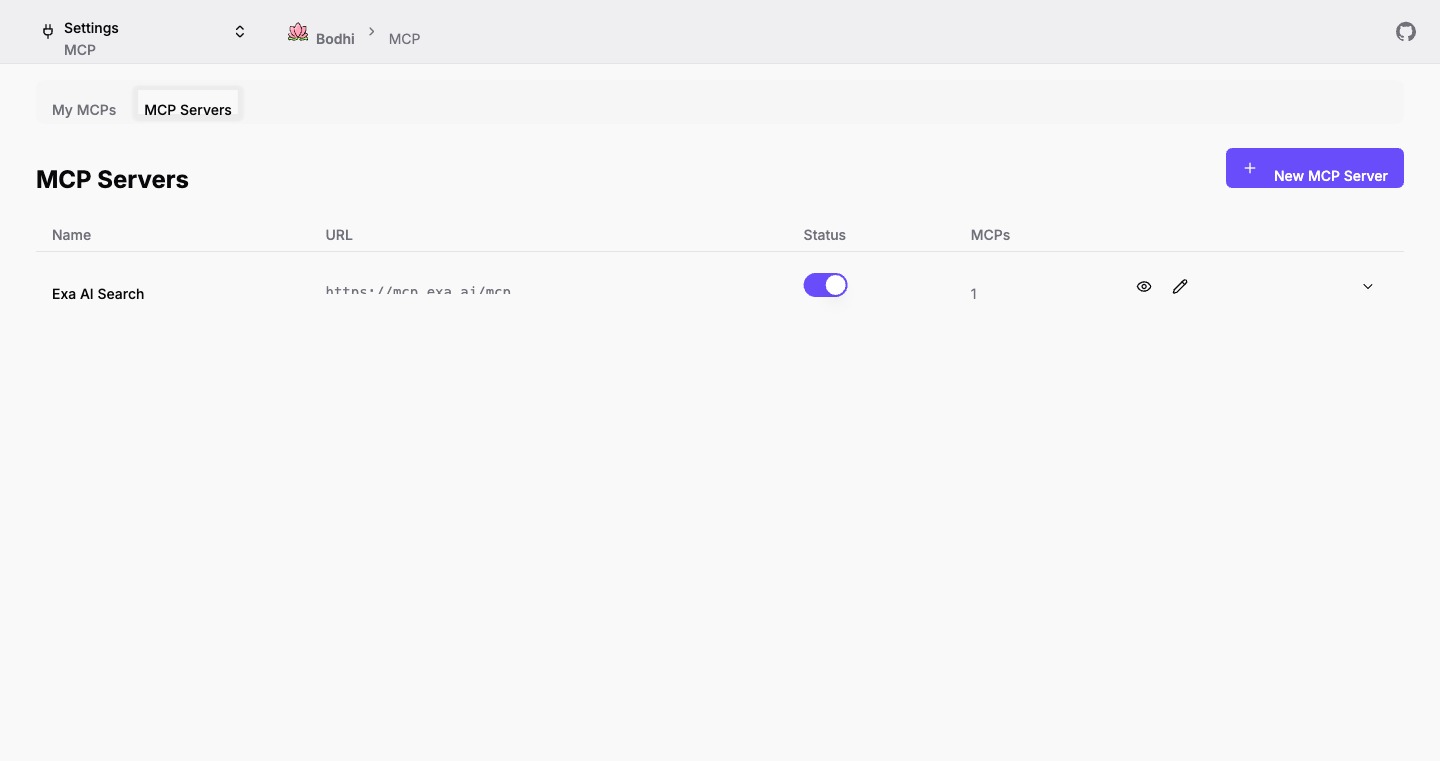
Admins see edit and toggle controls; non-admin users see a read-only view with status badges.
Creating a Server
Click New MCP Server to register a new endpoint. Required fields:
- URL -- The MCP server endpoint (e.g.,
https://mcp.example.com/mcp). The name field auto-populates from the URL's second-level domain when left blank. - Name -- A human-readable label (max 100 characters).
Optional fields:
- Description -- Brief description of the server's purpose (max 255 characters).
- Enabled -- Toggle whether users can create instances against this server (defaults to on).
Authentication Configuration
An optional collapsible section on the new server form lets admins configure authentication. Expand Authentication Configuration (Optional) to reveal the auth type selector with three options:
None (Public)
No authentication is required. Requests to the MCP server are sent without credentials. This is the default.
Header
Send a static API key or bearer token with every request. Fields:
- Name -- Label for this auth configuration (e.g., "Production API Key").
- Header Key -- The HTTP header name (e.g.,
Authorization). - Header Value -- The secret value (e.g.,
Bearer sk-...). Displayed as a password field. Stored server-side with AES-256-GCM encryption.
OAuth
Two registration sub-types are available, selectable via the Registration Type dropdown:
Dynamic Registration -- When selected (or when auto-DCR is active on the new server page), Bodhi automatically discovers the MCP server's OAuth endpoints by calling a discovery API. If discovery succeeds, the authorization endpoint, token endpoint, registration endpoint, and supported scopes are auto-populated. Bodhi then performs Dynamic Client Registration per RFC 7591/8414 at submit time, obtaining client_id and client_secret without manual entry.
If auto-discovery fails, the form silently falls back to pre-registered mode so the admin can fill in credentials manually.
Pre-Registered -- The admin manually provides:
- Client ID -- The OAuth client identifier.
- Client Secret (optional) -- The client secret if applicable.
- Authorization Endpoint -- The OAuth authorization URL.
- Token Endpoint -- The OAuth token exchange URL.
- Scopes (optional) -- Space-separated OAuth scopes.
Server View Page
The server detail page at /ui/mcp-servers/view?id=<serverId> shows server properties and lists all auth configurations. Admins can:
- Add new auth configurations directly from this page using the inline Add Auth Config form. This form supports the same header and OAuth types as the new server form, but uses
enableAutoDcr={false}-- discovery errors are displayed rather than silently falling back. - Delete existing auth configurations with a confirmation dialog. Deleting an auth config also removes all associated OAuth tokens and leaves linked MCP instances without authentication.
Editing a Server
The edit page at /ui/mcp-servers/edit?id=<serverId> allows updating the URL, name, description, and enabled state. If the URL changes, a confirmation dialog warns that cached tools and tool filters on all linked MCP instances will be cleared. Auth configurations are displayed read-only with a delete option.
MCP Instances
MCP Instances are user-level connections to registered MCP servers. Each user creates their own instances to control which tools they use. Manage them at /ui/mcps/.
Instance List
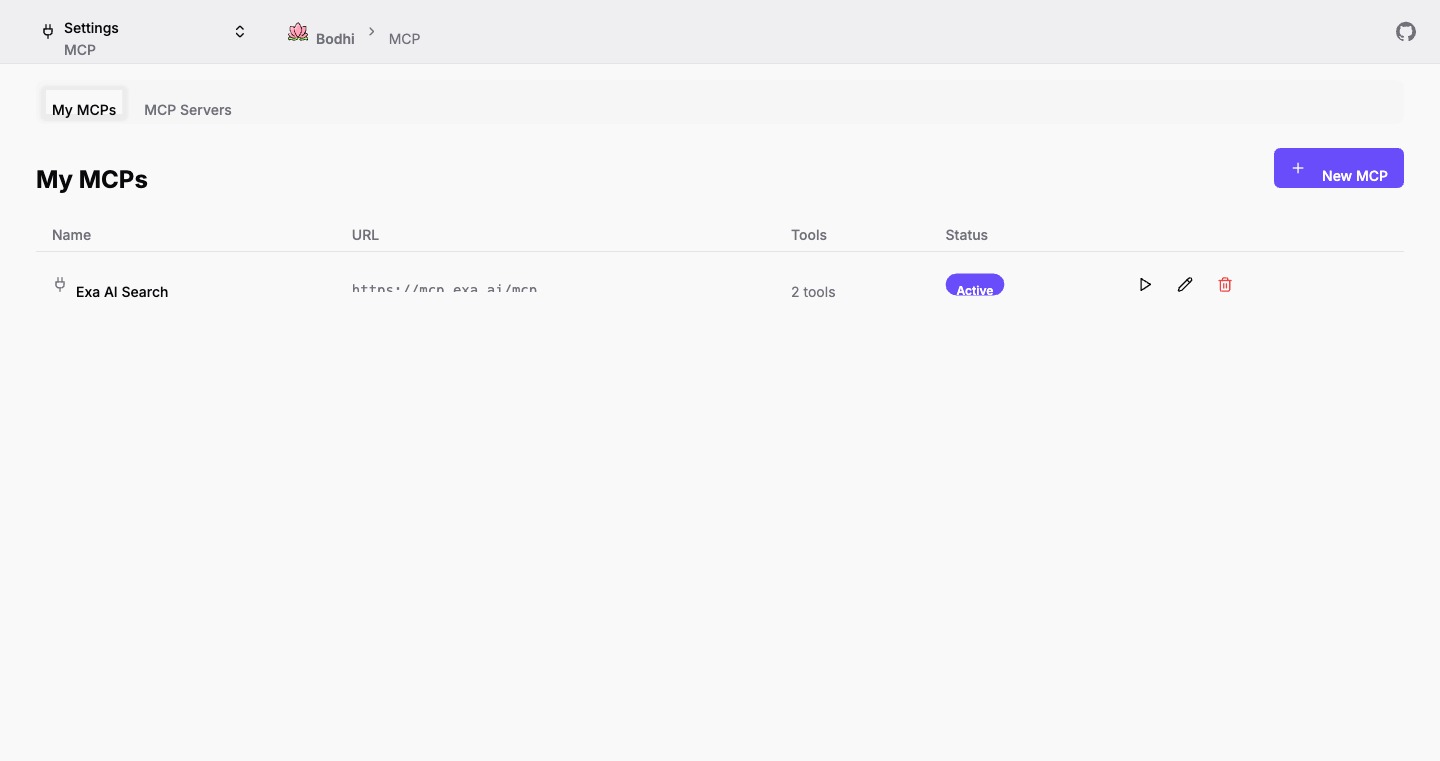
The My MCPs page shows a table of the user's instances with columns for name, server URL, tool count, and status. Status badges indicate:
- Active -- Enabled with whitelisted tools.
- No Tools -- Enabled but no tools whitelisted.
- Disabled -- Instance is turned off.
Each row provides action buttons for playground, edit, and delete. The playground and edit buttons are disabled if the parent server is disabled.
Creating an Instance
Click New MCP to open the creation form. The workflow:
-
Select an MCP Server -- A searchable combobox lists all enabled servers. Search filters by name, URL, and description. Admins see an "Add New MCP Server" option at the bottom.
-
Fill Instance Details:
- Name -- Friendly label for this instance.
- Slug -- Unique identifier using letters, numbers, and hyphens (max 24 characters). Auto-generated from the server URL's hostname.
- Description (optional).
- Enable MCP -- Toggle to make the instance active (defaults to on).
-
Configure Authentication -- A dropdown lists available auth configurations for the selected server:
- Public (No Auth) -- No credentials sent.
- Any header or OAuth auth configs registered on the server.
- Admins see a + New Auth Config option that redirects to the server settings page.
For header auth, selecting a config displays a summary showing the config name, header key, and whether a value is configured.
For OAuth auth, selecting a config reveals a Connect button. Clicking Connect:
- Saves the current form state to session storage.
- Redirects to the OAuth provider's authorization page.
- After approval, the callback page at
/ui/mcps/oauth/callbackexchanges the authorization code for a token and redirects back to the form with a green Connected badge. - A Disconnect button removes the OAuth token and returns to the auth config dropdown.
-
Discover and Select Tools -- Click Fetch Tools to query the MCP server for available tools. Each tool appears with a checkbox, name, and description. Use Select All / Deselect All for bulk control. The counter shows
N/M selected. Only selected (whitelisted) tools are available for execution. -
Create -- The Create button is disabled until tools have been fetched. Submit to save the instance and return to the list.
Editing an Instance
Navigate to the edit form via the pencil icon on the list page. The form pre-populates all fields including cached tools and their selection state. The MCP server selector is read-only in edit mode. For OAuth instances, the edit page shows the current connection status and allows disconnect/reconnect.
Click Update MCP to save changes.
Deleting an Instance
Click the trash icon on the list page. A confirmation dialog asks for confirmation before permanent deletion.
Related Documentation
- MCP Usage -- Playground, chat integration, and tool execution
- Chat UI -- Conversational AI interface
- Access Requests -- OAuth access request flow for third-party apps